Creating new policies
This article describes the criteria and procedures for creating new policies and includes the steps for editing and deleting existing policies.
IMPORTANT Some policies will continue to be created and maintained as they always have. The following articles include the information for configuring those policies:
Changing the SaaS Defense operating mode, Configuring the Email Threat Report, Deploying the Datto SaaS Defense Report Threat Add-In, Configuring the Rewrite Body Urls rule, Configuring the Replace Body on Block rule, Check SPF Spoofing per Domain configuration, Configuring spam control rules.
Policy criteria
When creating a new policy, you specify the following criteria:
- Action: A policy can either block or allow access to specific content.
- Policy Type: The component for which the policy is being created. The policy types are Email, File, and Link.
- Trigger: The trigger and the value you assign to it comprise the policy's criteria. An email policy can include more than one trigger. Email, file, and link triggers can have more than one value. See the Triggers section below.
- Client: The clients for which the policy applies. When a client creates a policy, this is not an available option, as a client can create a policy for itself only.
- Services: The services for which the policy applies.
Triggers
Each policy type has associated triggers. When creating an email policy, you have your choice of common email elements to select as a trigger. When creating a file or link policy, there is only one trigger for each, which is preselected.
A trigger must have a value that you assign to it. The trigger and the value comprise the policy's criteria.
The table lists the associated triggers for each policy type and describes requirements for entering trigger values.
| Policy type | Trigger options | Trigger value requirements |
|---|---|---|
| From Address,To Address, Return Path, Subject, Domain, Header |
|
|
| File | File Extension | NA - You select extensions from a list. |
| Link | URL | URLs can be entered in the following formats:
|
EXAMPLE Let's say you want to create an email policy for your organization that blocks all emails sent from the user@badwebsite.com email address. The appropriate trigger in this example is From Address. The value of the trigger is user@badwebsite.com.
When the policy is enabled, any email that your organization receives whose From address is user@badwebsite.com will be blocked.
EXAMPLE Your company is affiliating with a new vendor to process benefit enrollments for next year. The URL of the vendor's benefits site, www.benefitsco.com, will be included in the company email announcing the enrollment period. To make sure your employees can access the site, you create a Link policy that allows access and specify www.benefitsco.com as the URL trigger value.
Multiple triggers and values
An email policy can include more than one trigger. The criteria for each trigger must be met for the policy to be enforced. For example, the criteria for Trigger A AND the criteria for Trigger B must be met for the policy to be enforced. If the criteria for only one (or none) of the triggers is met, the policy won't be enforced.
Email, file, and link triggers can have more than one value. Only one trigger value must be met for the policy to be enforced. For example, Trigger A has three values assigned to it. Therefore, value 1 OR value 2 OR value 3 must be true for the policy to be enforced. If none of the values are met, the policy won't be enforced.
EXAMPLE ExampleCo creates an email policy to block emails received from two addresses that have a specific subject. The policy defines From Address as a trigger and market@testsite.com and no reply@example.com as the trigger values.
In addition, the policy includes the Subject trigger with invoice as the value. This policy blocks any email ExampleCo receives whose From address is market@testsite.com OR no reply@example.com AND whose Subject is invoice.
EXAMPLE ExampleCo creates a file policy to block access to content containing specific file extensions. The policy defines .cmd and .exe as the trigger values for the File Extension trigger.
IMPORTANT Trigger values are not listed in the table. For email policies that have more than one trigger, the table displays only the first trigger that was added. To display all trigger details, including multiple triggers and trigger values, click the policy's record. 
To hide the trigger details, click the policy's record again.
NOTE A policy cannot include more than one action. For example, the same policy cannot block one email address but allow another. A separate policy for each action would be required.
In addition, a policy cannot include more than one policy type. For example, the same policy cannot include an email policy type and a link policy type. A separate policy would be required for each.
Datto SaaS Defense uses a role based access control (RBAC) strategy regarding client policies. This means the role assigned to a user dictates the specific rights and restrictions the user has when working with client policies.
This is the role hierarchy that applies to client policies:
- Partner
- Client
A quick way to configure a policy with multiple trigger values is by uploading a comma-separated values (CSV) file. A CSV file is a text file where each row in the file is a record ending with a line break. You can upload a CSV file that includes each trigger value when creating email or link policies.
A CSV file is created using a text editor. It is required that each trigger value is formatted correctly based on the selected trigger. Each trigger value must be entered on its own row ending with a line break. The file must be smaller than 5 MB and saved with a .csv extension.
The table shows trigger value examples for each trigger.
| Trigger | Trigger value examples |
|---|---|
| From Address, To Address, Return Path (email policy) | aperson@testsite.com bperson@badwebsite.com cperson@csvexample.com |
| Subject (email policy) | computer car house |
| Domain (email policy) | www.testsite.com badwebsite.com www.csvexample.com |
| Header (email policy) | Format: key:value Example: IP Address:12.0.11.01 IP Address:10.2.10.07 |
| URL (link policy) | www.testsite.com badwebsite.com www.csvexample.com |
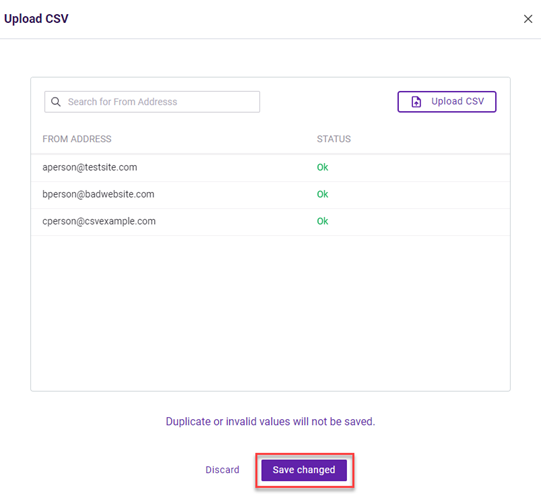
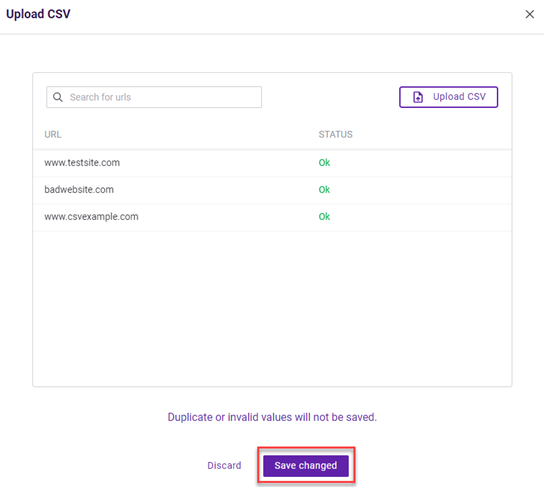
When you upload a CSV file, a dialog box is displayed so you can verify each trigger value and its status. An error is indicated for any trigger values that are not formatted correctly. You can decide whether to commit to adding the trigger values to the trigger or discard them.
When you commit to adding the trigger values, any trigger values containing errors will not be added to the policy.
The search box allows you to search for a specific trigger value or status.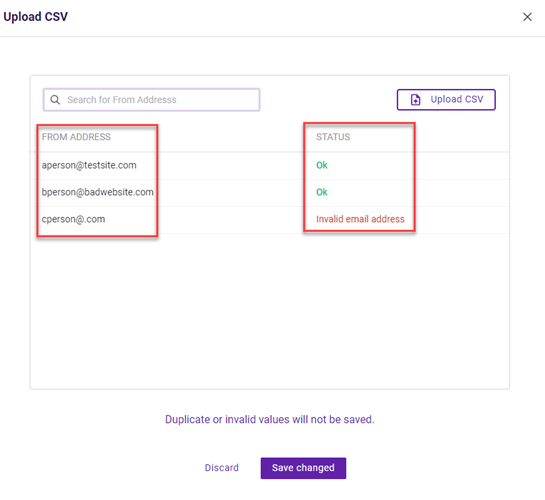
NOTE When uploading a CSV file, if the file is not smaller than 5 MB or does not have a .csv extension, an error message is displayed. As a result, the dialog box conveying each trigger value and its status is not displayed.
NOTE A trigger and a value are required to be added before a CSV file can be uploaded for an email policy. This is not required for a link policy. The steps for uploading a CSV file are included in the procedures Creating a new email policy and Creating a new link policy.
The email Header trigger is commonly used to allowlist an email based on its Header and Value. This is often done when you want to conduct an email phishing test with your client end users. By sending mock phishing emails, you help end users understand what a phishing attack looks like and train them to avoid clicking malicious links. A phishing simulation provides end users with real-life experience without any risk to the organization.
To ensure SaaS Defense does not interfere with these campaigns, you can allowlist the header and/or value provided by your phishing campaign. SaaS Defense will ignore those emails to ensure the most accurate results.
Datto Saas Defense needs to be made aware of this address so it allows the emails to be received by the end users. Otherwise, the emails will be inspected and blocked. During inspection, SaaS Defense clicks the links included in the emails to identify the destination sites. Therefore, the phishing campaign will assume that the end users clicked the links, producing inaccurate campaign results.
When creating an email policy, you can enter an email address in the username@domain format, but another option is to use a regular expression (regex). With a regex, you create a text string pattern that SaaS Defense compares to an address (i.e., From Address, Return Path Address, To Address) included in an incoming email.
Consider a Restricted Emails By From Address Rule example where the email address is specified using the regex: je[0-9]*@badwebsite.com. Let's analyze each component in the rule.
- je: From Address starts with the letters je.
- [0-9]: includes a number between 0 and 9.
- *: infinite times. Any number between 0 and 9 can appear an infinite number of times.
- @badwebsite.com: the badwebsite.com domain.
An incoming email whose From Address matches all of the Restricted Emails By From Address Rule criteria is blocked or flagged.
NOTE A regex can include a maximum of 30 characters.
- On the Main menu, click Settings.

- Click Create a New Policy.

- In the Policy Type section:
- For the Action toggle:
- To create a policy to allow access to content, click Allow.
- To create a policy to block access to content, click Block.
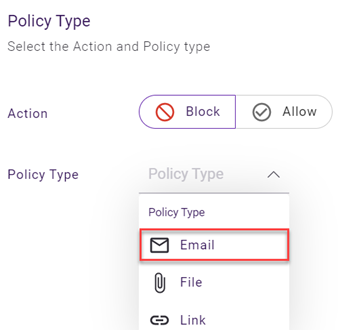
- In the Policy Type list, select Email.
- In the Email Triggers section:
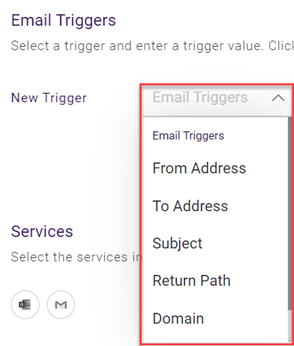
- In the New Trigger list, select the applicable trigger.
- In the Trigger Value field, enter the value.

Note: The email address can include a maximum of 30 characters. - Click Add Trigger.

The trigger is listed in the Email Triggers section.
- To add another trigger value:
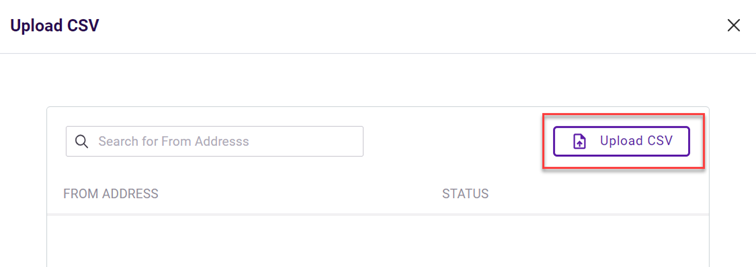
- To add multiple trigger values by uploading a CSV file:
- To add another trigger, repeat steps 4a through 4c.
In this example, the Subject trigger has been added to our email policy.
- In the New Trigger list, select the applicable trigger.
NOTE If desired, you can upload a CSV file to the trigger added in step 4f.
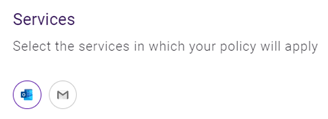
- In the Services section, select the services for which this policy will apply. If applicable, you can select more than one service.
-
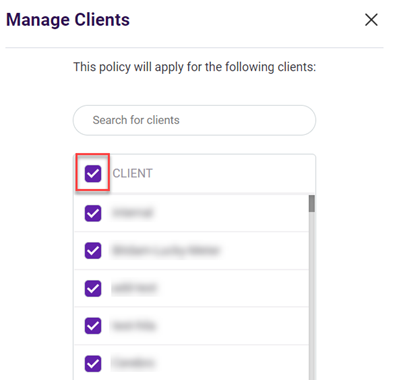
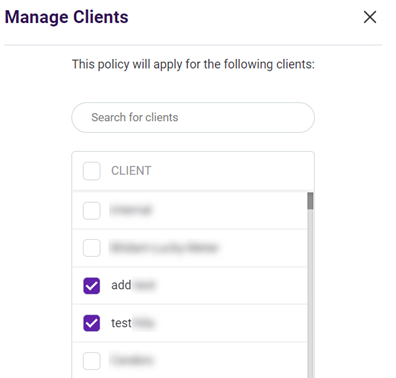
This step applies to partners only. In the Clients section, All Clients is selected by default. To apply the policy to specific clients only:
NOTE You can search for clients using the search box.
NOTE Include Future Clients is selected by default. The policy will automatically apply to every new client added to the policy's services. If that is not desired, clear the check box.
- At the bottom of the page, click Save.
NOTE If you decide not to create the new policy, click Discard at any point prior to clicking Save.
- On the Main menu, click Settings.

- Click Create a New Policy.

- In the Policy Type section:
- For the Action toggle:
- To create a policy to allow access to content, click Allow.
- To create a policy to block access to content, click Block.
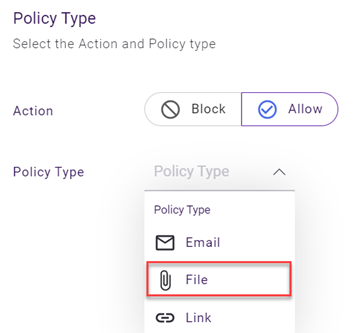
- In the Policy Type list, select File.
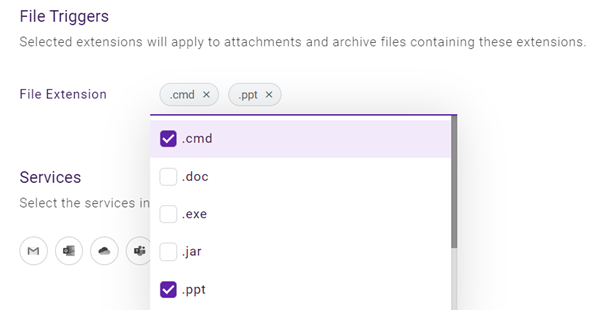
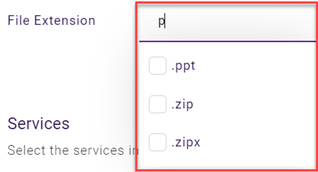
- In the File Triggers section:
-
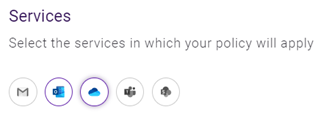
In the Services section, select the services for which this policy will apply. You can select more than one service.
-
This step applies to partners only. In the Clients section, All Clients is selected by default. To apply the policy to specific clients only:
NOTE You can search for clients using the search box.
NOTE Include Future Clients is selected by default. The policy will automatically apply to every new client added to the policy's services. If that is not desired, clear the check box.
- At the bottom of the page, click Save.
NOTE If you decide not to create the new policy, click Discard at any point prior to clicking Save.
- On the Main menu, click Settings.

- Click Create a New Policy.

- In the Policy Type section:
- For the Action toggle:
- To create a policy to allow access to content, click Allow.
- To create a policy to block access to content, click Block.
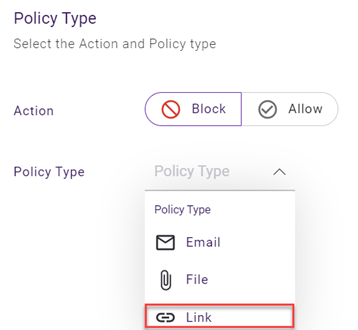
- In the Policy Type list, select Link.
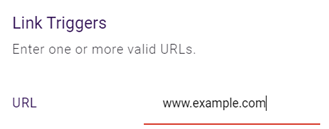
- To add trigger values one at a time:
- To add multiple trigger values by uploading a CSV file:
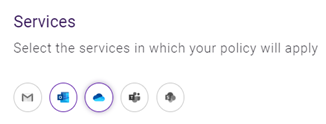
- In the Services section, select the services for which this policy will apply. You can select more than one service.
-
This step applies to partners only. In the Clients section, All Clients is selected by default. To apply the policy to specific clients only:
NOTE You can search for clients using the search box.
NOTE Include Future Clients is selected by default. The policy will automatically apply to every new client added to the policy's services. If that is not desired, clear the check box.
- At the bottom of the page, click Save.
NOTE If you decide not to create the new policy, click Discard at any point prior to clicking Save.
You are allowed to edit only policies that you created. You can edit a policy's trigger criteria, services, and clients. However, the policy's Action and Policy Type values cannot be changed. The steps for editing a policy are the same for all policy types, except where noted.
- To add another trigger value, perform the steps that apply to the Policy Type you are editing.
NOTE For an email policy, you can add a new trigger by following the steps in the Creating a new Email policy section.
- To delete a trigger value, click the X.

- To delete an existing trigger, click the Remove icon.

- To edit services, click the appropriate service icon to select a new service or deselect a previously selected service.
- This step applies to partners only. To edit clients:
- Click Manage Clients.
- Select or clear the applicable check boxes.
- Click Save.
NOTE If you don't want to commit to the changes you have made, click Discard at any point prior to clicking Save.
- At the bottom of the page, click Save.
- Verify the edits in the Policies table.
A policy can be edited only by the user that created the policy. However, with the View As feature, a partner can assume a client role and act on behalf of the original policy creator. Therefore, a partner can create, edit, and delete policies on behalf of a client.
There are two situations in which the View As feature can be used:
- The partner's Policies page includes a policy that was created by a client, as indicated by the View Policy icon
 . The partner can use View As to edit the policy on behalf of the client.
 - The partner would like to assume the role of a specific client, perhaps to list just the policies that apply to that client. The partner has the ability to edit if needed.
The View As feature is a convenient way for partners to provide direct support to their clients. In the Partner procedures section, see the procedure Using View As.
It is recommended that you are comfortable with the procedures for creating and editing policies prior to using View As.
NOTE The View As feature is available for partners only.
To edit a policy listed on the Policies page using View As:
- On the Main menu, click Settings.

- On the Policy page, click the desired record. The record should include the View Policy icon in the last column.
- Click Edit Policy with "View As."

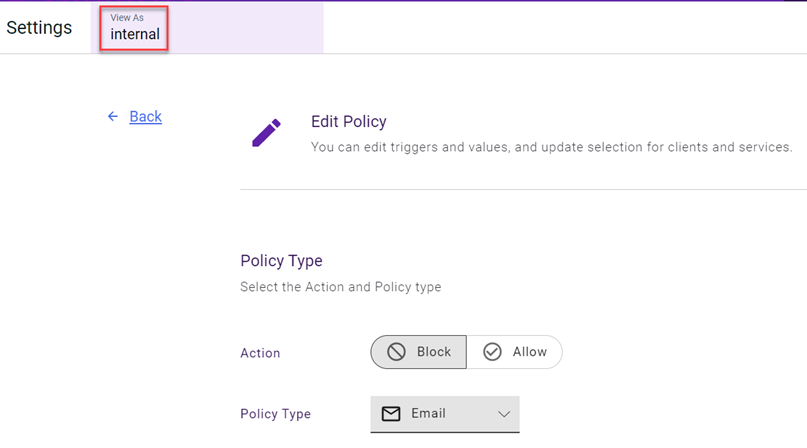
- The Edit Policy page is displayed. The View As box changes to the name of the organization that originally created the policy.
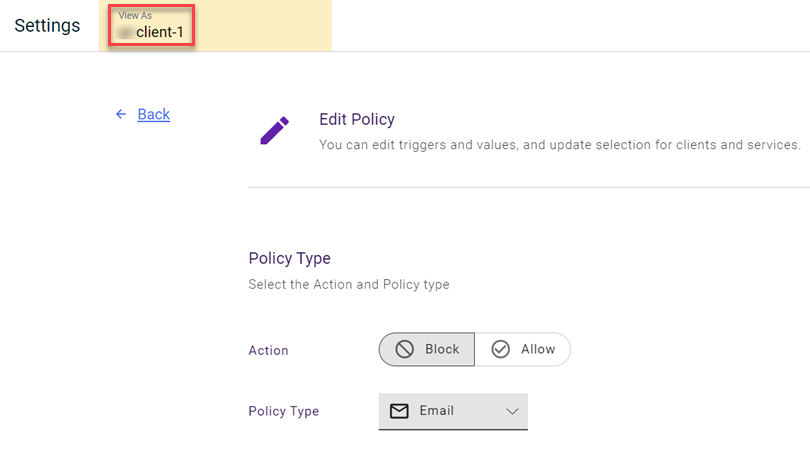
- Make the desired edits.
To assume a role lower in your hierarchy using View As:
- On the Main menu, click Settings.

- By default, your organization is selected in the View As list. Click your organization's name.

- In the list, select the applicable organization.
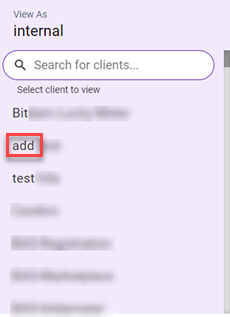
NOTE You can use the search box to find a specific client. The list filters as you enter text.
- View As updates to show the selected organization.

Only the policies for the selected organization are displayed in the Policies table. - To create a new policy for the organization, click Create a New Policy. Perform the steps for the applicable policy type.
- To edit a policy, click the desired record.
.


