Deploying the Datto SaaS Defense Report Threat Add-In
IMPORTANT The procedures described in this article can be performed by Datto partners only.
The Datto SaaS Defense Report Threat add-in is an application intended for the Microsoft Outlook applications of your clients' end users. It enables an end user to notify you when the end user believes an email should have been handled differently by Datto SaaS Defense.
There are two situations in which a client end user would want to report a threat incident. In one situation, the end user believes an email is a security threat that should have been quarantined by Datto SaaS Defense, but it wasn't. In the other situation, an email was quarantined by Datto SaaS Defense but the end user verifies it is not a threat. Therefore, the email should not have been quarantined.
To give your clients' end users the ability to report an incident, you need to deploy the Datto SaaS Defense Report Threat add-in to each of your client end users. When an end user submits a report, it appears on the Datto SaaS Defense Events page.
NOTE The Datto SaaS Defense Report Threat add-in is supported by the webmail and desktop versions of Microsoft Outlook.
Perform the following steps to deploy the Datto SaaS Defense Report Threat add-in:
- Log into the Microsoft 365 Admin Center.
- In the left navigation menu, click Show All.

- Click Settings > Integrated Apps.

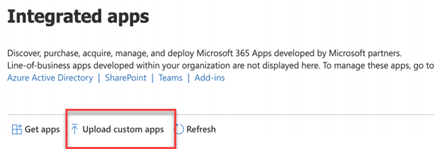
- On the Integrated Apps page, click Upload Custom Apps.
- On the Upload Apps to Deploy page, select Provide Link to Manifest File.
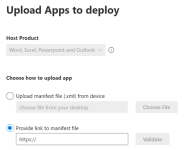
- Copy one of the links below (there is a Datto branded version and non-Datto branded version) and paste it into the Provide Link to Manifest File text box. Pasting the link will automatically replace the pre-populated text https://.
Datto version: https://reportplugin.blob.core.windows.net/package/manifest.prod.xml
Non-Datto version: https://reportplugin.blob.core.windows.net/addin/manifest.prod.xml
- Click Validate.
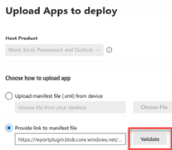
- The message Manifest File Validated is displayed. Click Next.

- On the Add Users page, verify Datto Report Threat is listed.
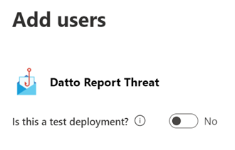
If it is not, click Back and make sure the https address in step 6 is entered correctly. Make the necessary edits and repeat steps 7 - 9. - On the Add Users page, select Entire Organization.
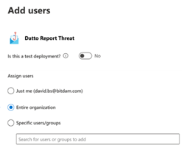
IMPORTANT Selecting Entire Organization will automatically deploy the Datto SaaS Defense Report Threat add-in to each new client's end users or current client's end users that are added in the future. Therefore, you won't need to perform the deployment steps again.
- Click Next.
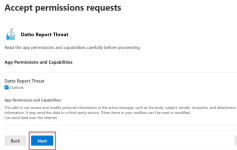
- On Accept Permissions Request page, click Next.
- On the Review and Finish Deployment page, verify:
- Apps to Deploy indicates Datto Report Threat.
- Assigned Users indicates Entire Organization.
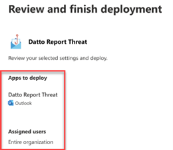
If these values are not indicated, at the bottom of the page, click Back to navigate to the applicable page and select the correct value. - Click Finish Deployment.

- Click Done. In the Integrated Apps section, Datto Report Threat is listed.
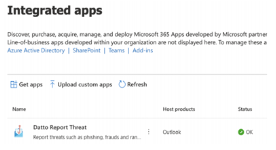
NOTE It may take up to six hours for the add-in to be deployed to all of your clients' end users.
IMPORTANT The Reporting a threat incident article includes end user instructions for reporting a threat incident. It is important that you provide it to your clients and review the instructions with them. This ensures that clients understand their threat incident reporting tasks.
Removing the Datto SaaS Defense Report Threat Add-In
If desired, you can remove the Datto SaaS Defense Report Threat add-in from each of your client's Microsoft Outlook applications.
Perform the following steps to remove the add-in:
- Log into the Microsoft 365 Admin Center.
- In the left navigation menu, click Show All.
- Click Settings > Integrated Apps.
- On the Integrated Apps page, click Datto Report Threat.

- On the Datto Report Threat page, click Remove App.
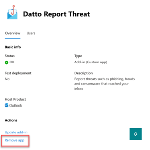
- In the dialog box verifying you want to remove the application, select Yes and click Remove.
- Within a few seconds, a message is displayed indicating the application was removed. Click Done.


