Performing a live email search
There are several reasons you may want to search your clients' emails. Maybe you'd like to analyze only the emails of clients who have been targets of a specific attack. Or, perhaps you need to investigate why a specific client's emails are being blocked.
Whatever your reason is for performing a Live Search, the feature enables you to search your clients' Exchange 365 mailboxes to find emails quickly and take action if necessary.
For example, if you've identified an email as potentially harmful to your clients, you can quarantine it immediately. Also, if warranted, you can release an email from quarantine.
Using the Live Search feature, you can search for emails that have the same subject field contents or were sent from the same email address.
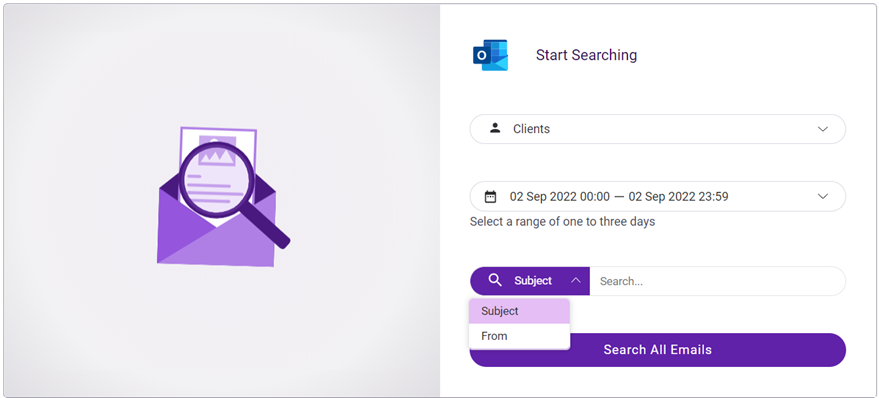
To perform a live email search, you specify the following:
- The clients for whom the search applies.
- The date range for which the search applies. A maximum of three days can be included in the date range you select. The application searches for and displays a list of only those emails that were received by end users within the selected date range.
- The contents for the Subject field (e.g., declined) or From field (e.g., sender@domain.com). When using the Subject field, emails are returned that include all or part of the Subject field contents you enter. For the From field, the full email address is required.
In this example, in the Choose clients field, 4 indicates that four clients were selected. The date selected for the search is 01 Sep 2022. Test is entered as the Subject field criteria.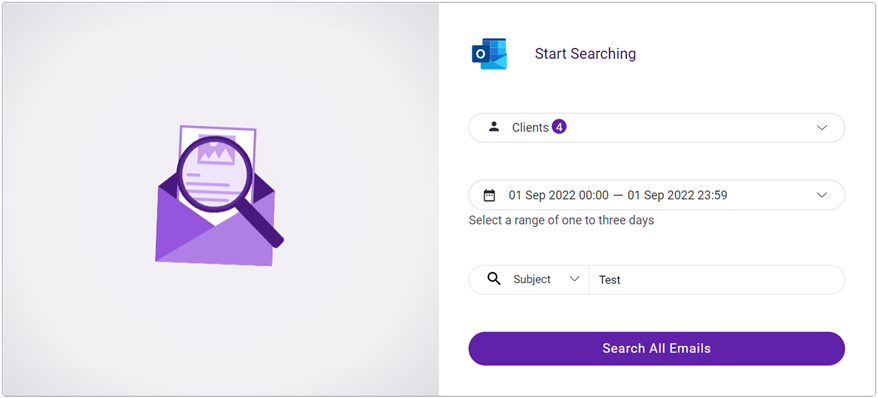
The search results show all end user emails, a total of 118, that match the criteria specified. As in this example, you may need to scroll to see all records. The Status column indicates whether the end user accessed the email (i.e, Read, Not Read). The Verdict column shows whether SaaS Defense Approved or Quarantined the email or found it to be Malicious.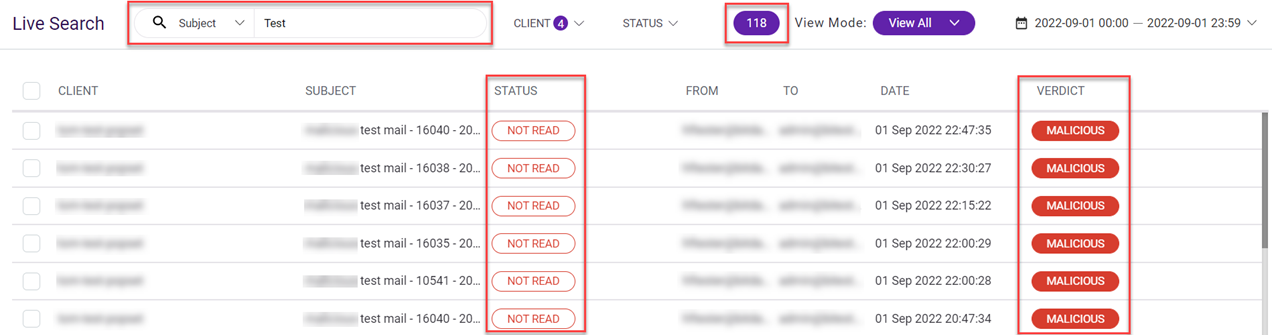
Each email record includes a checkbox in the first column that when selected, allows you to quarantine the email.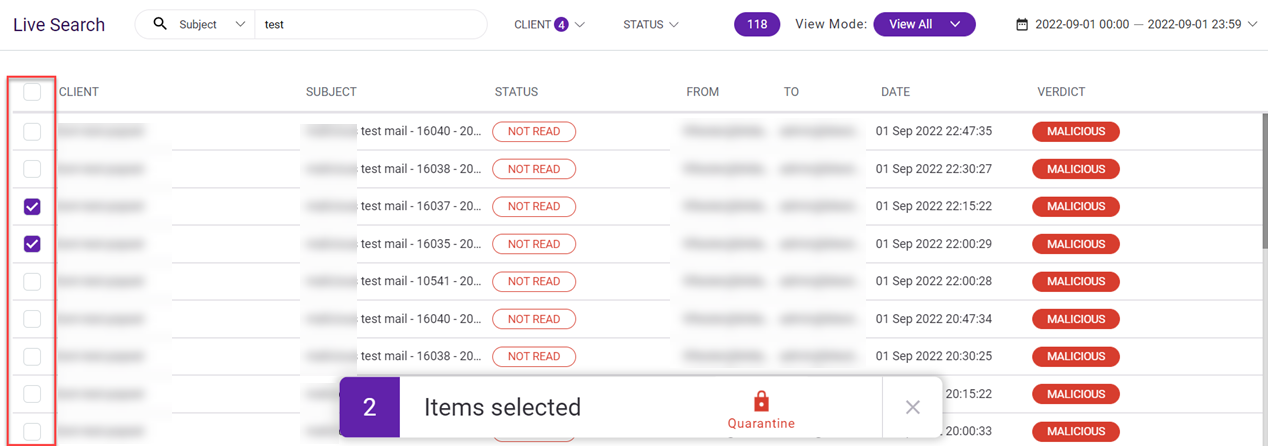
NOTE The Live Search feature returns results for Exchange 365 end users only.
Investigating emails in-depth
The Live Search page allows you to access more detailed email information, if you choose. You can click an email record to display the Verdicts & Info pane. This pane is identical to the Verdicts & Info pane accessed from the Malicious page and provides the same details and functionality.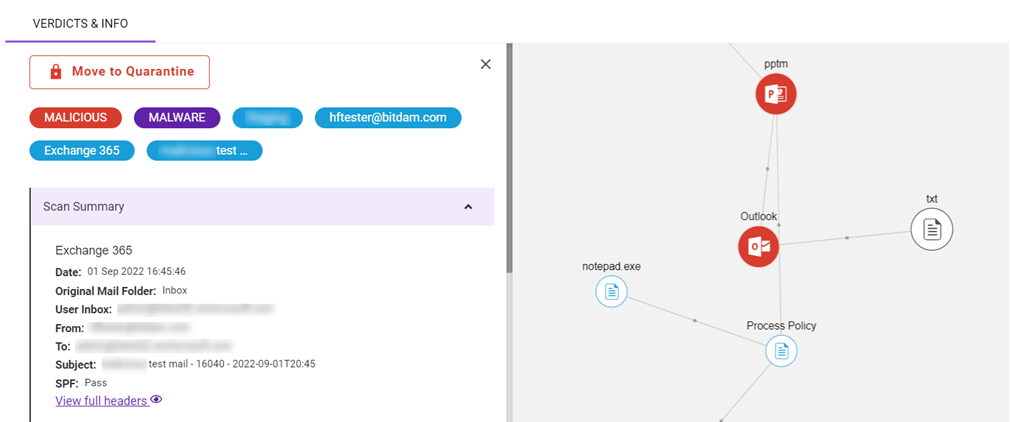
Therefore, for a client in prevention mode, an email whose Verdict equals Malicious can be investigated and released directly from the Live Search page. Consequently, an email whose Verdict equals Approved can be investigated and quarantined.
For a client in monitoring mode, an email whose Verdict equals Malicious or Approved can be investigated and quarantined directly from the Live Search page.
When you are done working with the Verdicts & Info page, click the X at the top of the page to return to your Live Search page results.
For more information about the Verdicts & Info pane, refer to the article Analyzing threats on the Malicious page page.
NOTE In rare circumstances detailed information for an email may not be available and therefore, its record is not clickable.
Filtering options
You can filter search results using the Client and Status (Read, Not Read) filters.
In addition, you can change how the records are displayed using View mode. Flat is selected by default, meaning each record is listed separately in the results table.
Selecting Grouped in View mode groups each email with matching Client, Subject, and From information into one record (one row). The Read/Total column indicates the number of emails in the group that have been accessed (Read) by the end user and the total number of emails included in the group. Grouping emails is a quick way to quarantine the emails included in the group all at once.
To perform a live email search:
- On the Main menu, click Live Search.
-
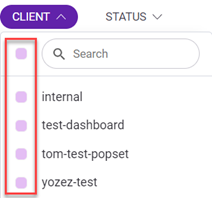
Click Client and select the checkbox for each desired client. Or, to search the emails of all of your clients' end users, select the top check box (next to the Search box).
-
Click outside the client list to close it.
-
Click the Calendar field and select the desired date range. For more information, see the article Using the Calendar tool.
NOTE A maximum of three days can be included in the date range you select.
-
To base your search on an email's Subject field, in the Search box, enter subject field text.
NOTE Text entered in the Subject field or From field is not case-sensitive. A minimum of three characters is required in each field.
-
To base your search on an email's From field:
- Click Subject.
- In the list, click From.
- In the Search box, enter an email address.
-
Click Search All Emails.
-
On the Live Search results page, if desired, select filtering options.
-
To quarantine an email(s) from the Live Search page:
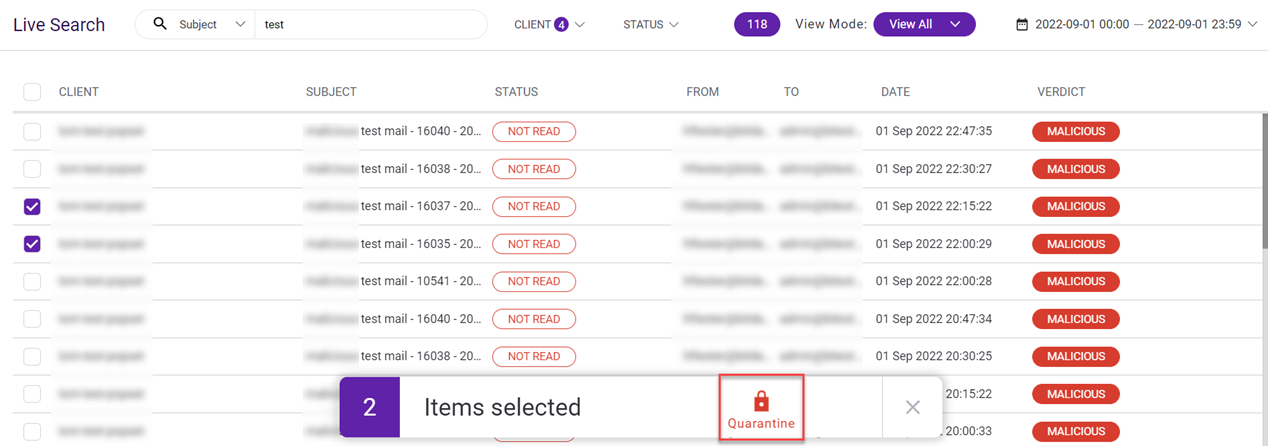
- For the desired email record(s), in the first column, select the checkbox. To select all emails, select the checkbox at the top of the column.
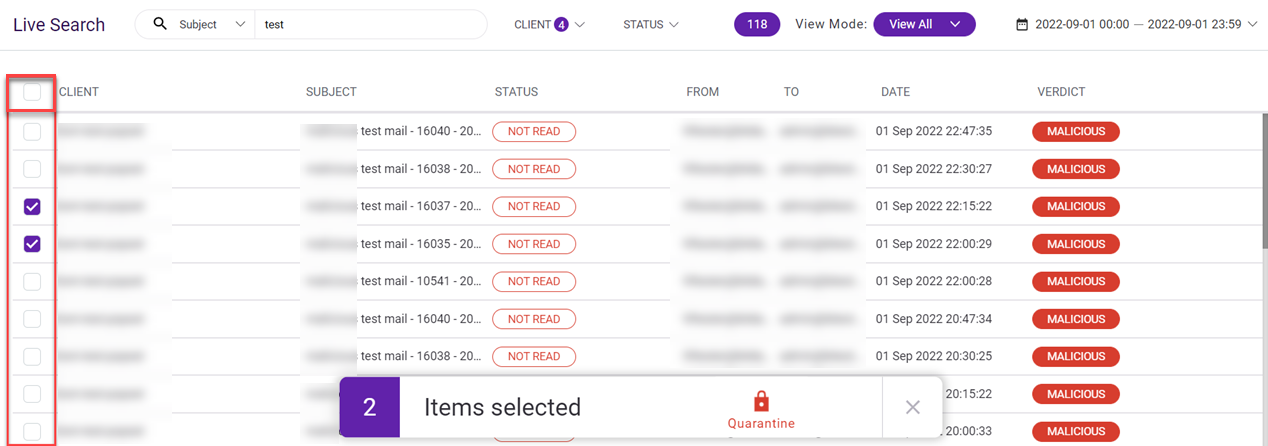
- Click Quarantine.
- For the desired email record(s), in the first column, select the checkbox. To select all emails, select the checkbox at the top of the column.
- To investigate an email in-depth:
- Click the desired email record.
- Review the information in the Verdicts & Info pane and the Scan Dynamics pane.
- If applicable, change the email's current quarantine status. For example, for an email that you determine should be quarantined, click the Move to Quarantine button. For a quarantined email that you determine is not malicious, click the Release from Quarantine button.
- Click the X at the top of the page to return to your Live Search page results.
- To perform another search, complete the required search fields at the top of the Live Search results page. The results update as you complete each field.


